
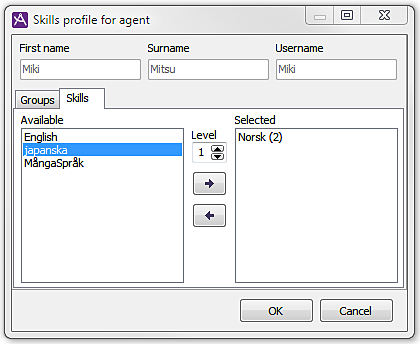
In the middle, between the lists, there are arrow buttons you click on to move the selected row(s) from one list to the other. Just make sure the correct user is selected in the list in the User accounts window.
To add Access areas, Subareas, Groups, and Skills, you click on the Change tab below each respective panel in the User accounts window.
With the Change button you open windows that all function largely in the same way. You find lists with the Selected title and the corresponding with the Available title.
|
|
In the middle, between the lists, there are arrow buttons you click on to move the selected row(s) from one list to the other. Just make sure the correct user is selected in the list in the User accounts window. |
When all changes have been carried out, you click on the OK button to return to the User accounts window.
The Access areas window shows which organisation areas and subareas the user with the user account in question has the access rights to supervise and configure. Add and delete as described above. More information is found in Access areas section.
In the Belongs to subarea window you see the subareas that belong to the selected organisation area. Add and delete as described above. More information is found in Subareas section.
The Change button below the Groups list and the Change button below the Skills list open the same window. The window has two tabs. In the Groups tab you add and Delete as described above. In the Skills tab you select and deselect in the same way. The only difference is that you can grade a selected skill. You specify the user’s skill level by selecting a figure between 1 and 9. The higher the figure, the higher the skill.
In the bottom part of the User accounts window you can add, change and Delete a user account’s email account (the email address). Start by selecting the row for the relevant user in the list above.
If the emails are read, composed and sent via CallGuide Agent’s email window, you do not have to supply an address, but it may be useful to have together with your other user information
If the agent will be handling emails in a separate email application, you enter the email address and tick the check-box Do not use the integrated email client for this user.